Back to tutorials
CMYK
SEPARATING AND SIMULATING ARTWORK LAYERS
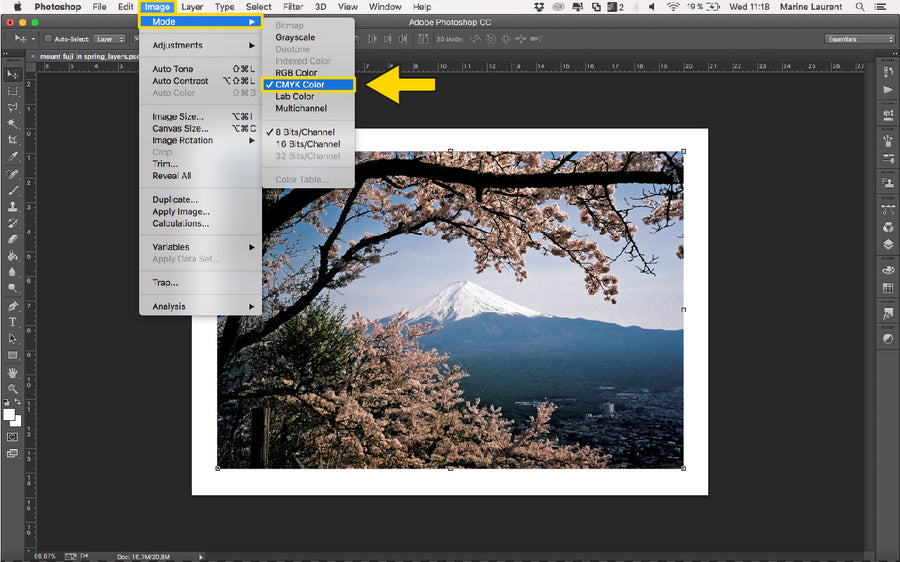
STEP 1: Open your file in Photoshop, and go to 'Image' then 'Mode' and set the artwork to 'CMYK'.
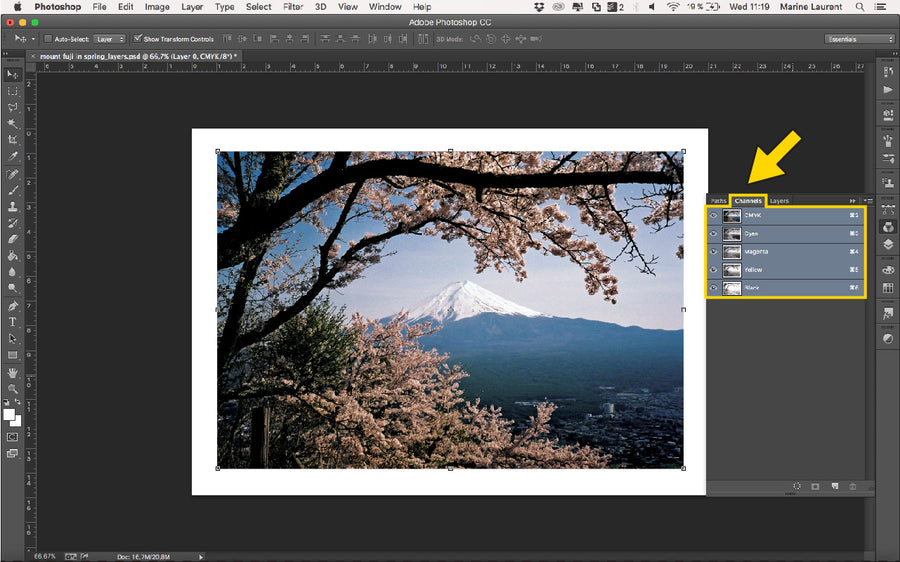
STEP 2: Click on the 'Channels' panel to reveal the colour channels. If the 'Channels' panel is not visible you can locate it in the 'Window' menu.
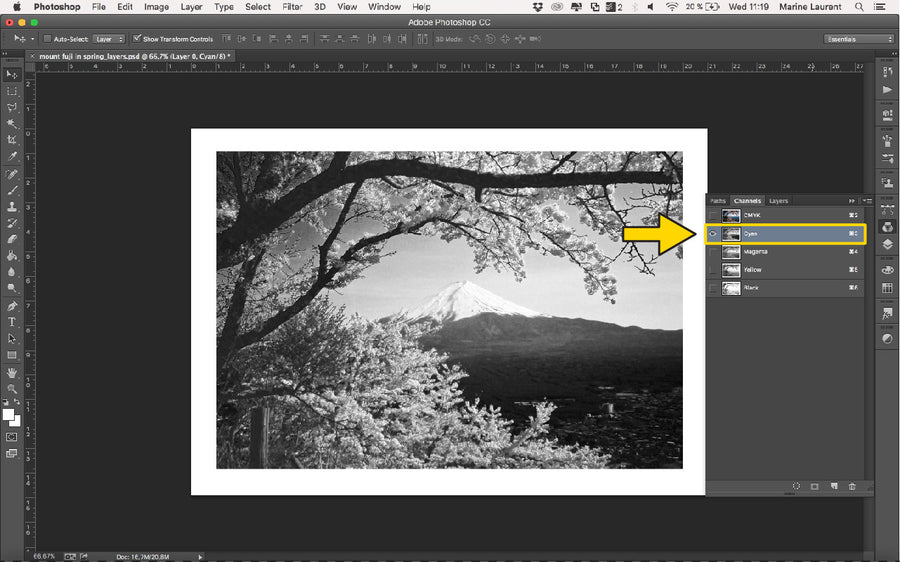
STEP 3: Select the 'Cyan' chqnnel to reveal the greyscale channel.
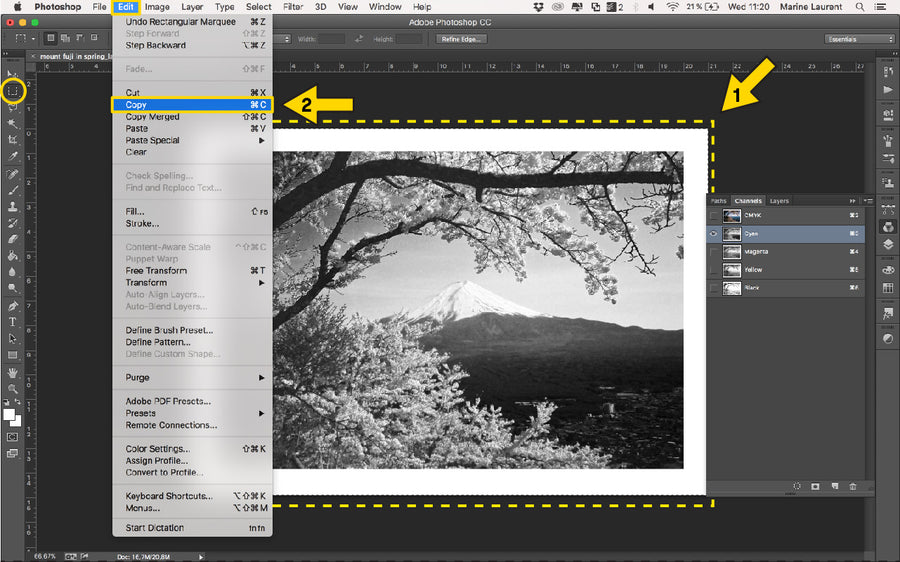
STEP 4: Select all of the image on the canvas using the selection tool and then select 'Copy’.
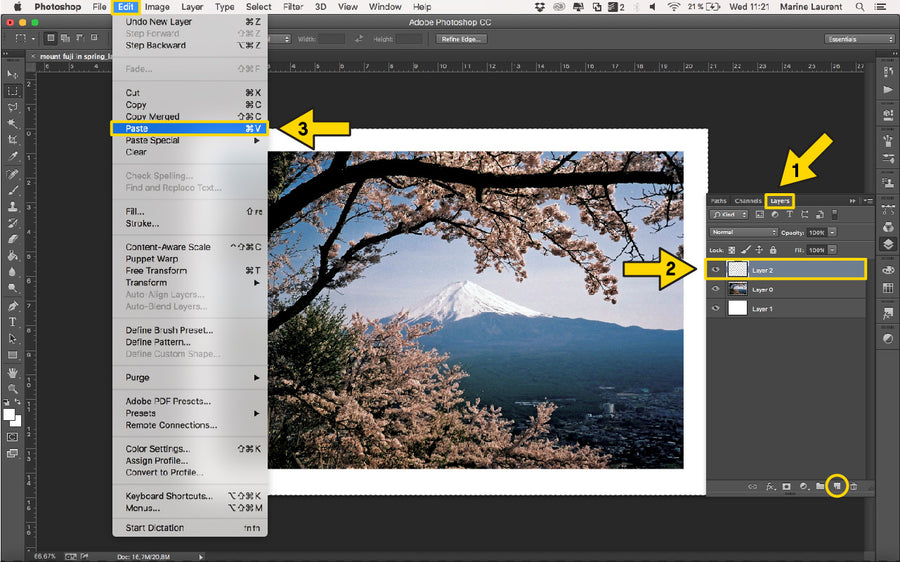
STEP 5: Go back to 'Layers' panel and create new layer. Click on the 'Edit' menu, and 'Paste' the greyscale channel.
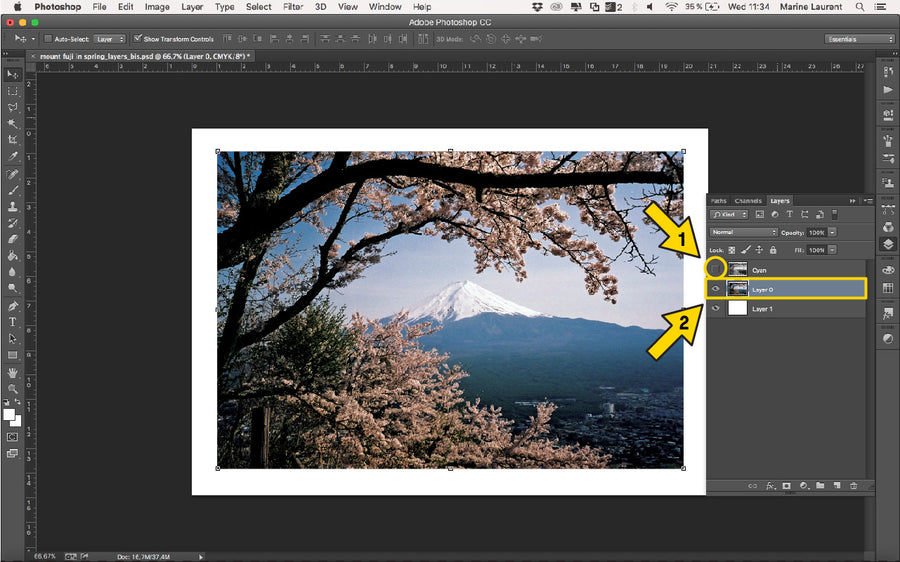
STEP 6: Now, turn this new layer off, by clicking the ‘eye’ to the left of the layer key, and select the original image again.
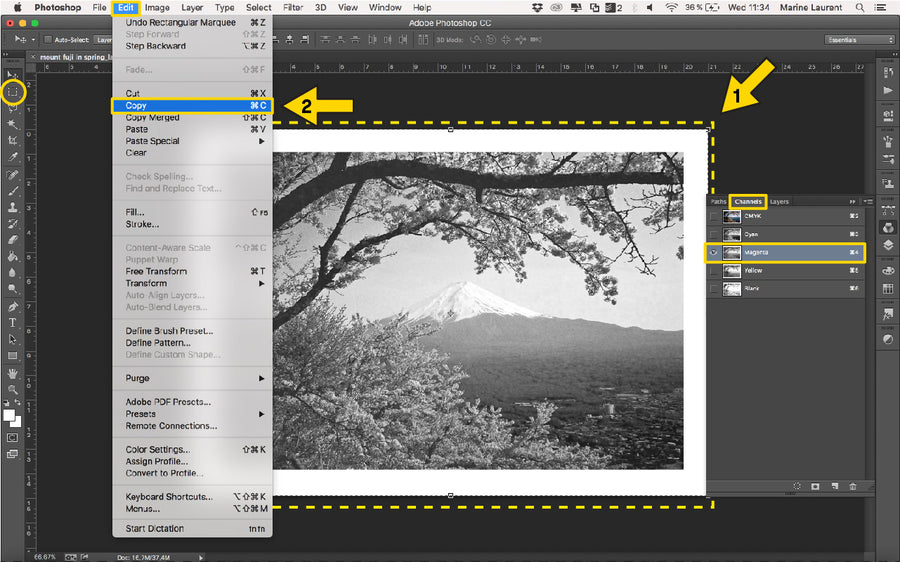
STEP 7: Click back onto the 'Channels' panel again, and select 'Magent'. Repeat the process as before: select all, and copy.
STEP 8: Paste the channel as before. Rename each layer as you go, to note which file matches which separation, and avoid confusion.
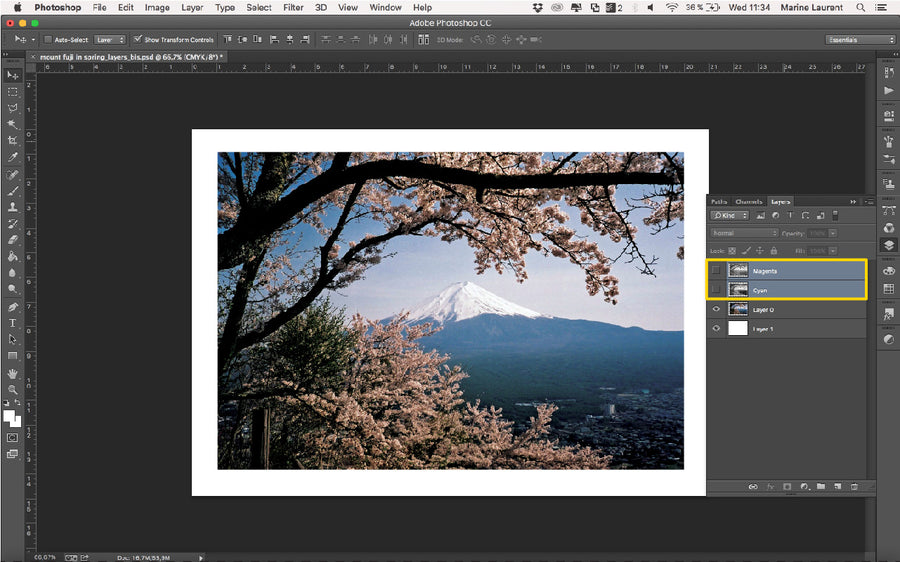
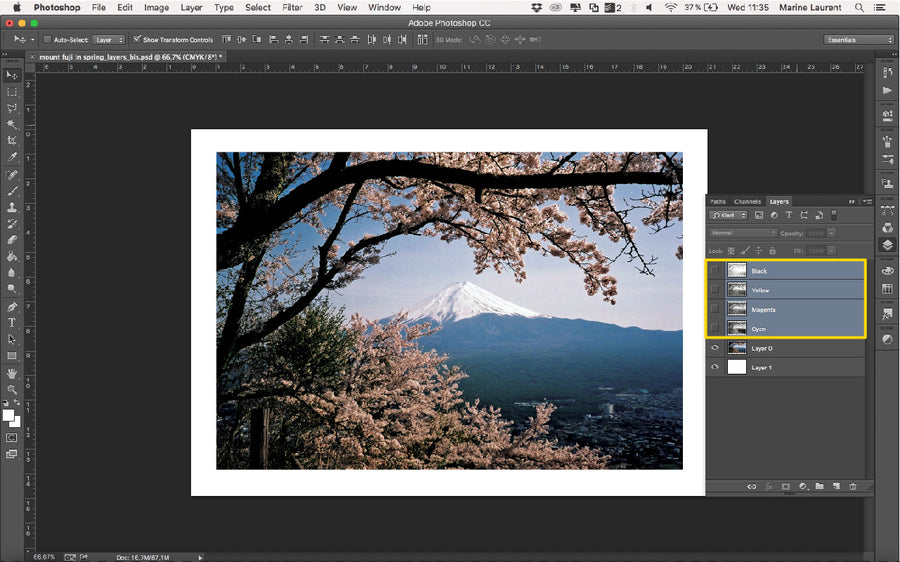
STEP 9: Once you’ve completed the process for all channels, you now have successfuly created the 4 colour stencils to simulate the CMYK process.
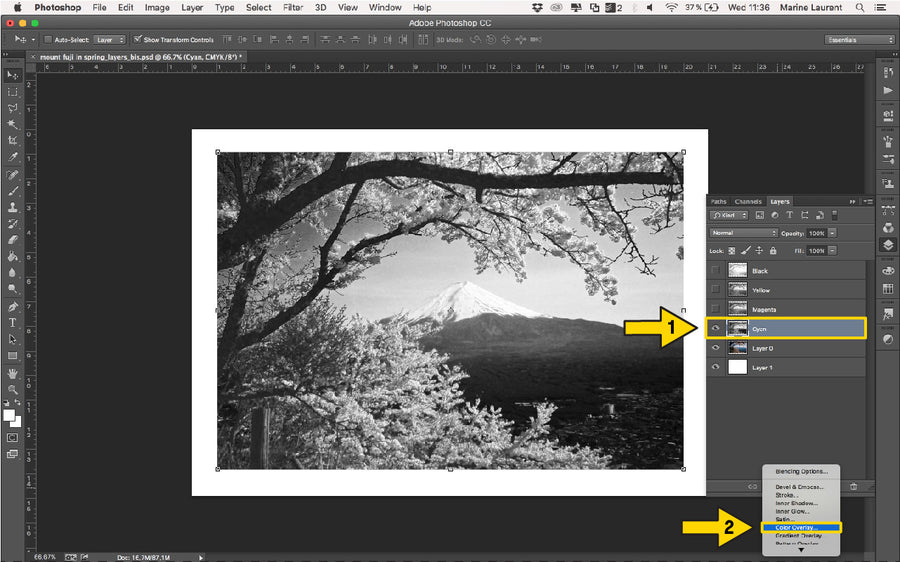
STEP 10 (ADVANCED SET UP): We'll start with the 'Cyan' layer. Click on the ‘fx’ symbol at the bottom of the ‘Layers’ tab. A drop down will appear. Click on ‘Color Overlay...’.
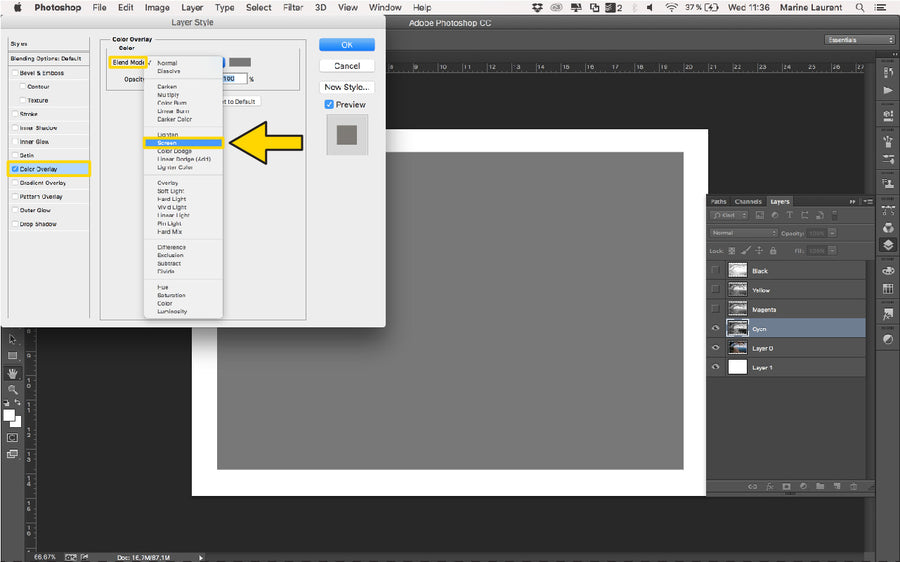
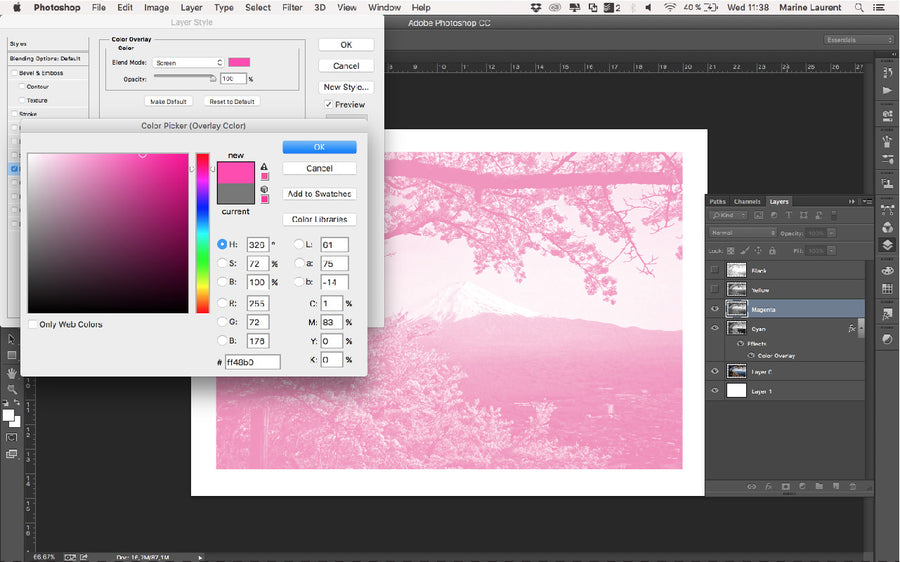
STEP 11: A new window will open. In the 'Color Overlay' tab, change the ‘Blend Mode’. Click on the drop down, and select ‘Screen’.
STEP 12: To change this colour, double click on the rectangle. A new window will appear. Select the ink you want in the 'Swatches' tab. Then 'OK'
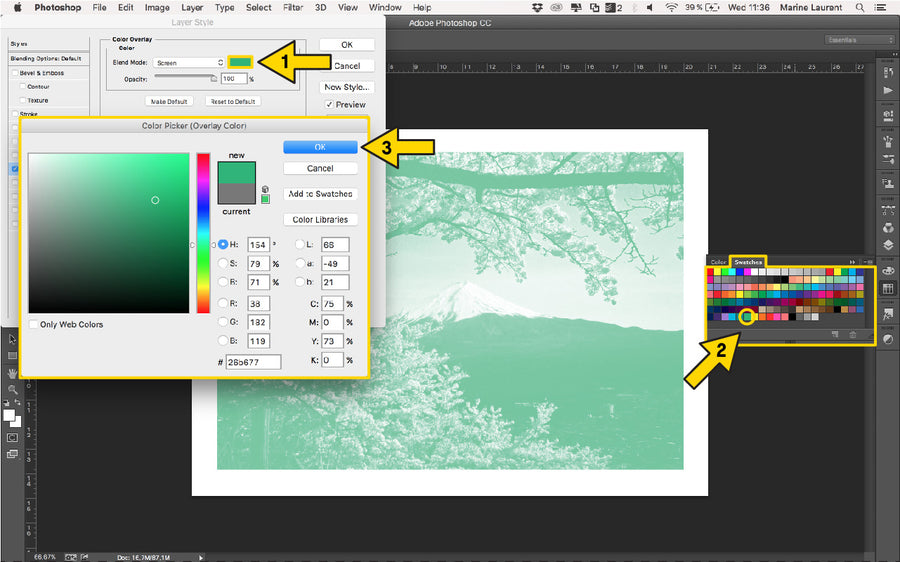
STEP 13: Do the same for each colour layer, by selecting the ink you want to print with.
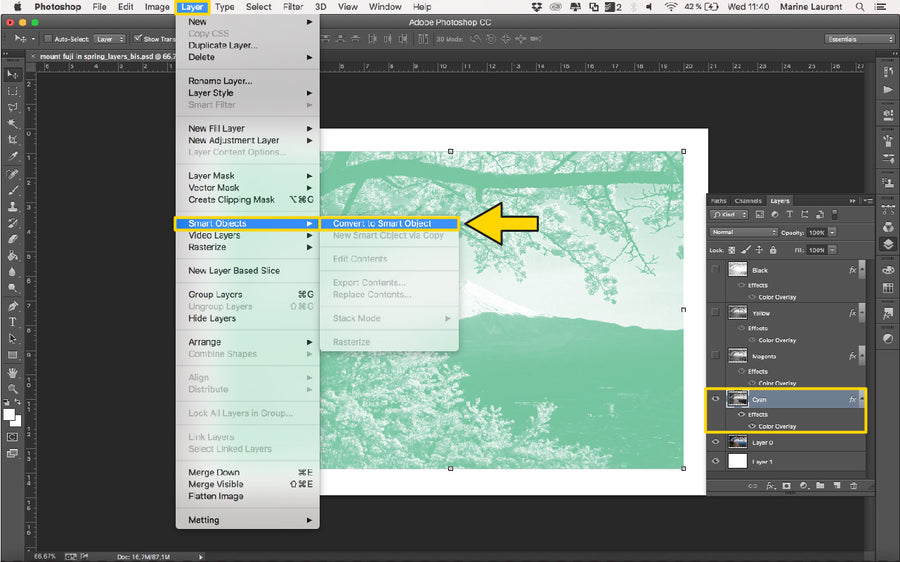
STEP 14: Once you have choosen your colours, convert each layer to 'Smart Object'. It is important to do this one by one.
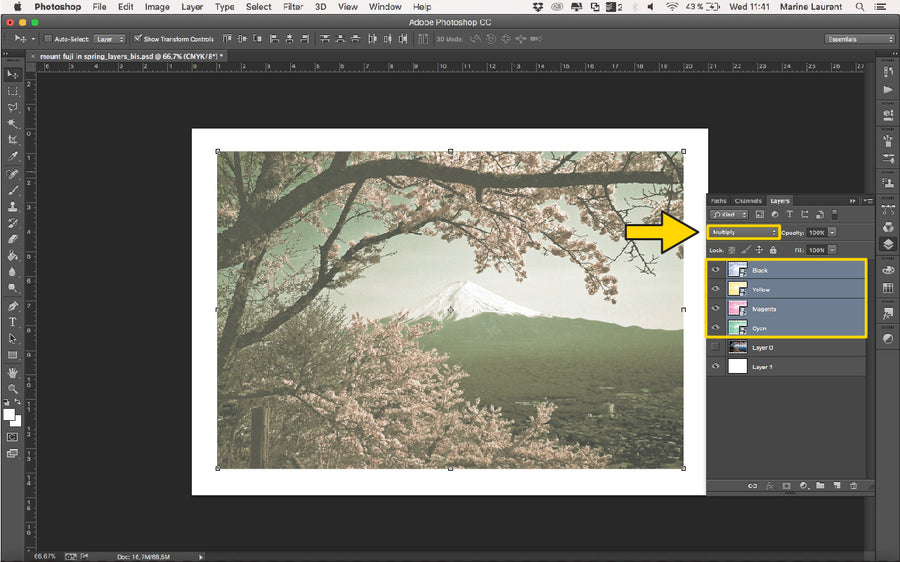
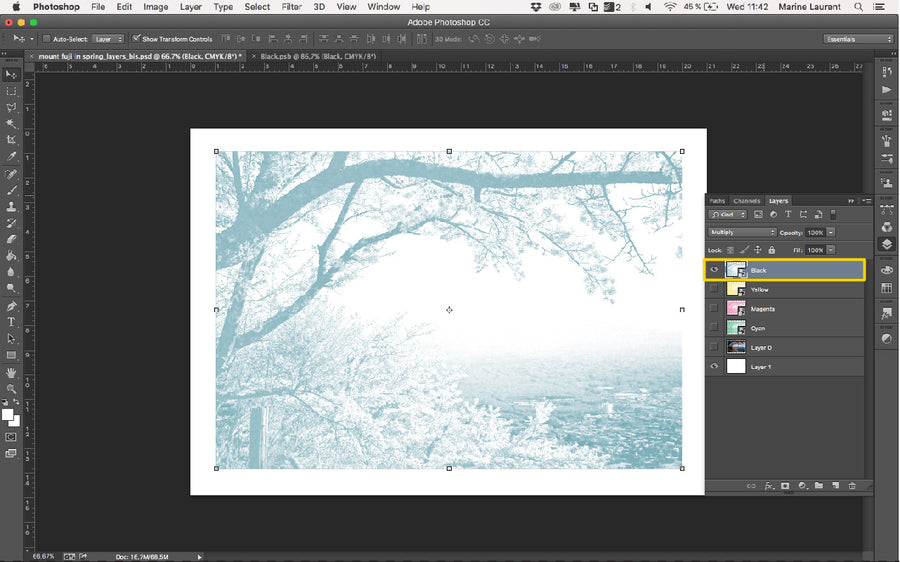
STEP 15: Select the four colour layers and choose 'Multiply' in the drop down. Now you can see simulation of the printed outcome.
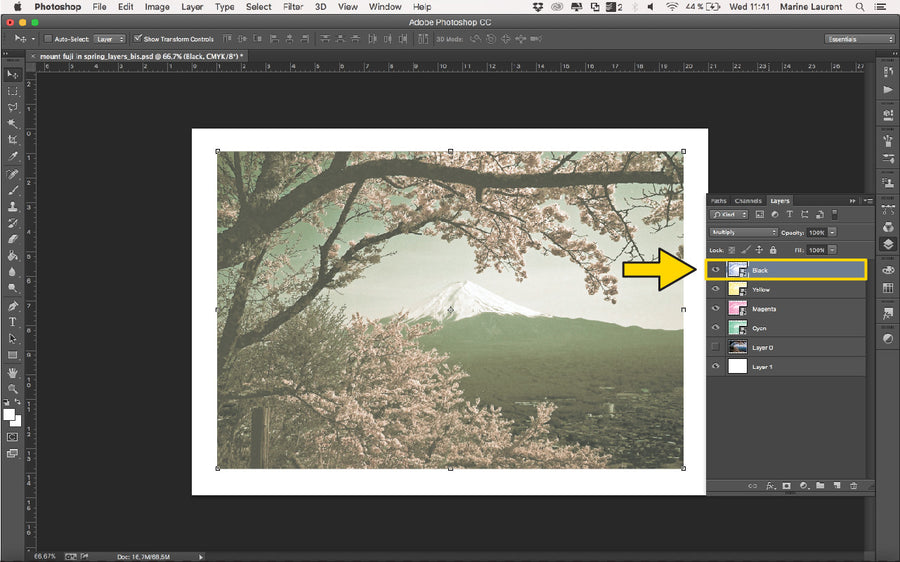
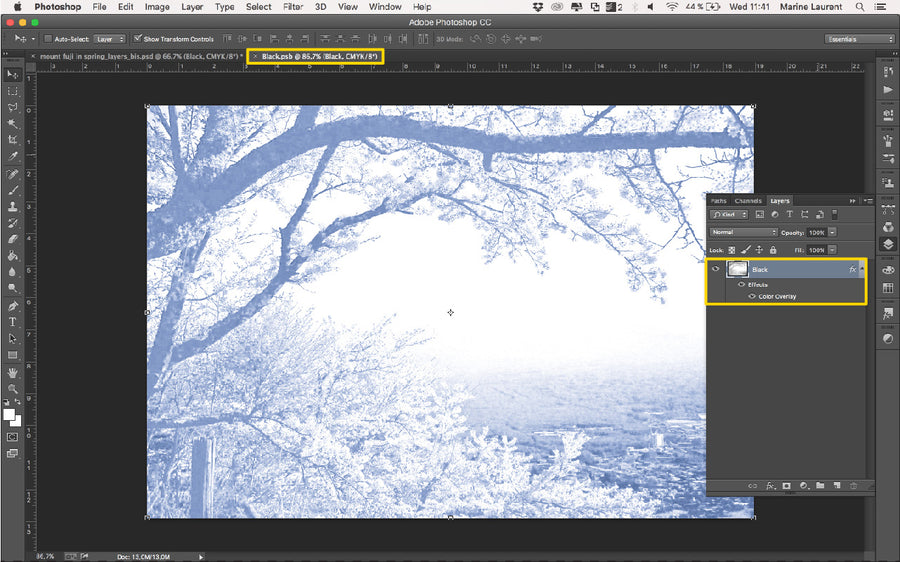
STEP 16: If you want to change the colour of layer, double-click on the one you want to edit, to open a new window.
STEP 7: A new window will open, with a .psb version of your layer.
STEP 18: Double-click on 'Color Overlay' to open the window and change the colour. Do the same as before by choosing an ink in the 'Swatches' tab.
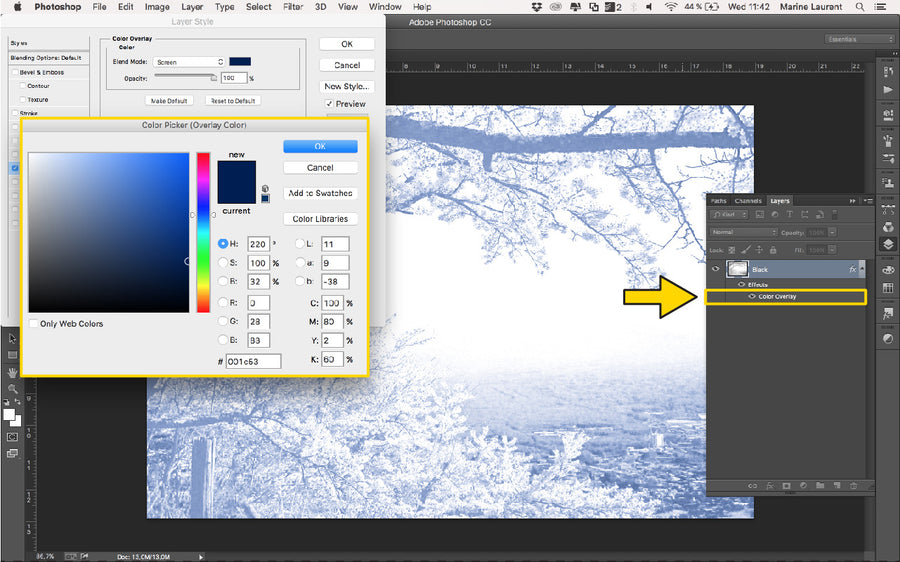
STEP 19: To see this change implemented in your main working file (with all the colour layers), you have to 'Save' the changes in this file.

STEP 20: You can now see your updated layer in your first file. Once your happy with the inks, we can save each layer asa separation.
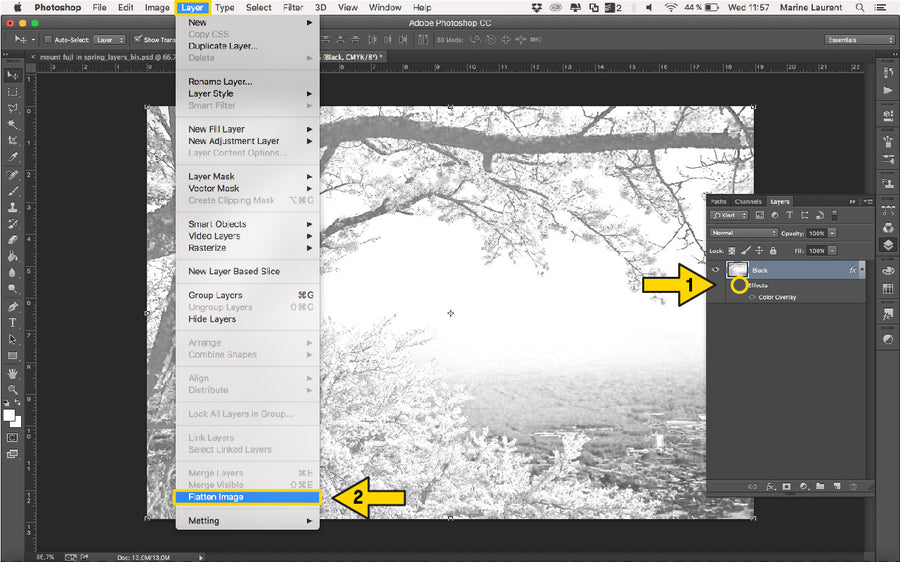
STEP 21: To save your first colour stencil, double-click on the layer to open the new window again. Turn off the 'Effects', then 'Flatten' your image.
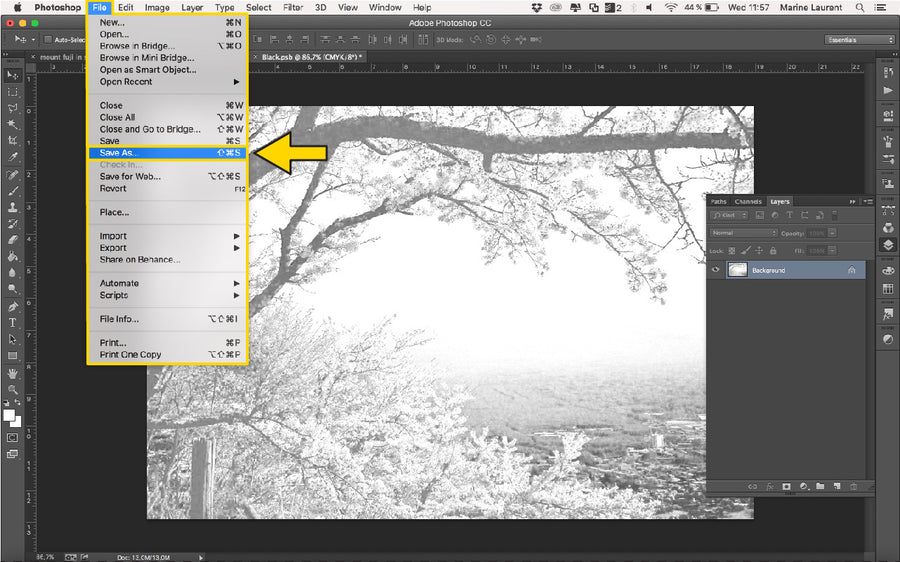
STEP 22: Now we are ready to save this file. Go to 'File' and 'Save As...'.
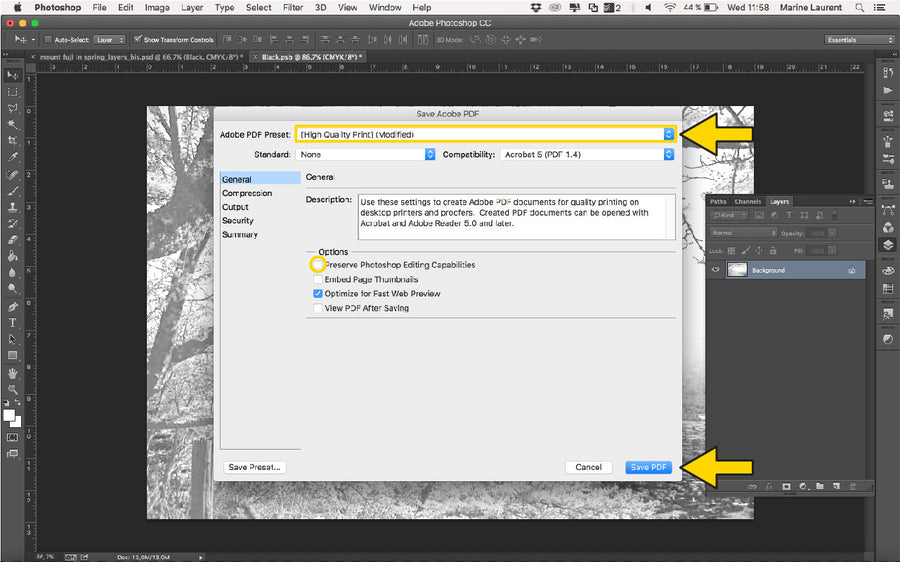
STEP 23: Name your file appropriately with Your name/Project title + the ink colour assigned to the artwork. The format should be PDF, and untick all the boxes.
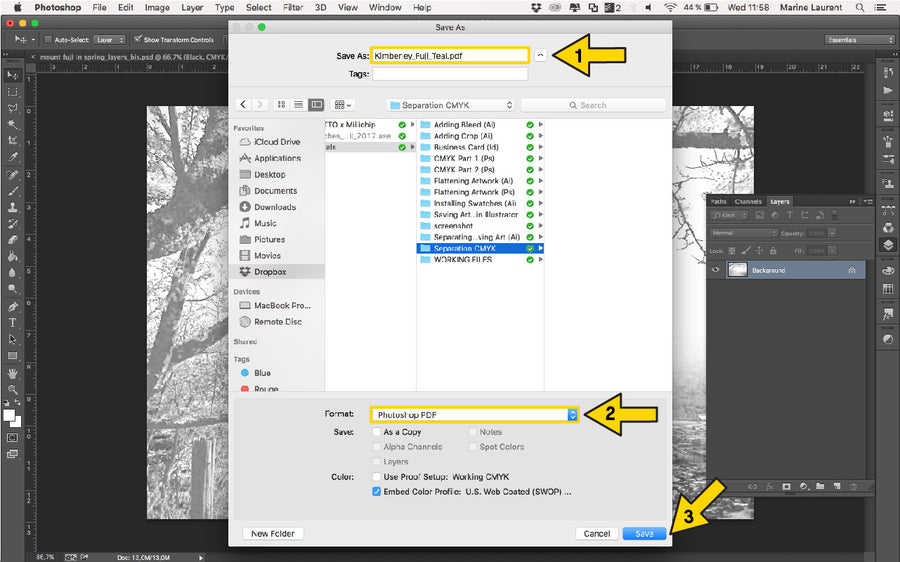
STEP 24: Select the Preset ‘High Qualiity Print’ and untick ‘Preserve Photoshop Edit- ing Capabilities’. Hit ‘Save’, and you should be left with a file under 10MB.