Back to tutorials
DUO TONE
SEPARATING CMYK CHANNELS FOR TWO COLOUR PRINT
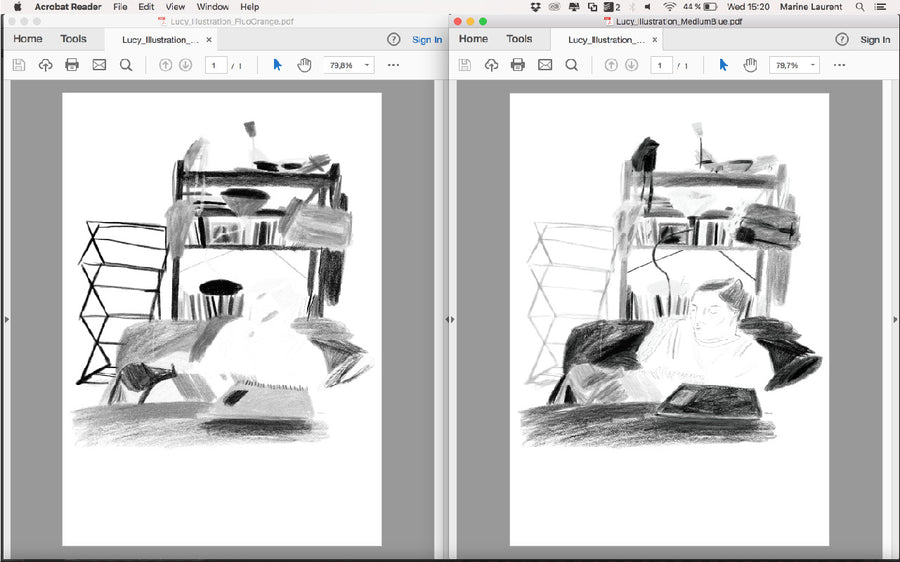
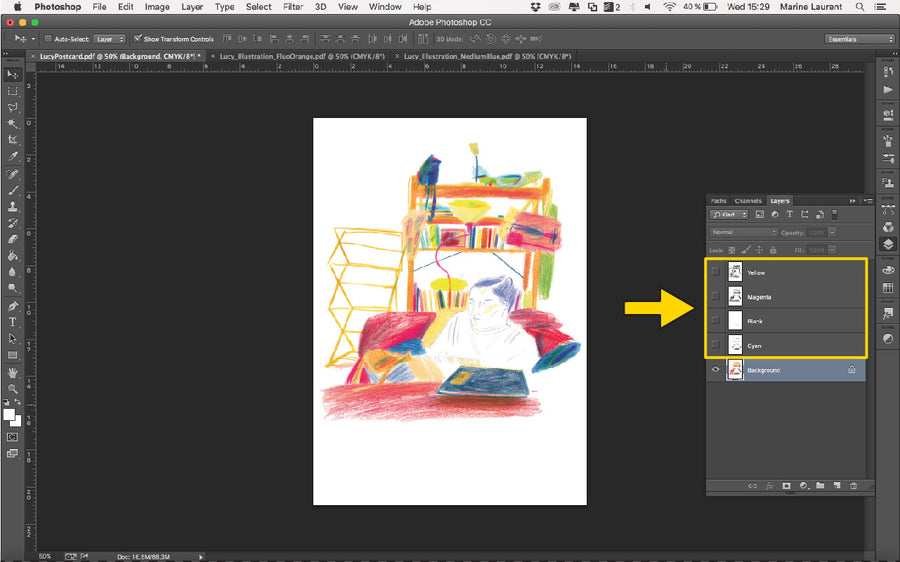
STEP 1: Like in our other CMYK tutorial, we start by creating our four colour stencils from the four CMYK 'Channels.'
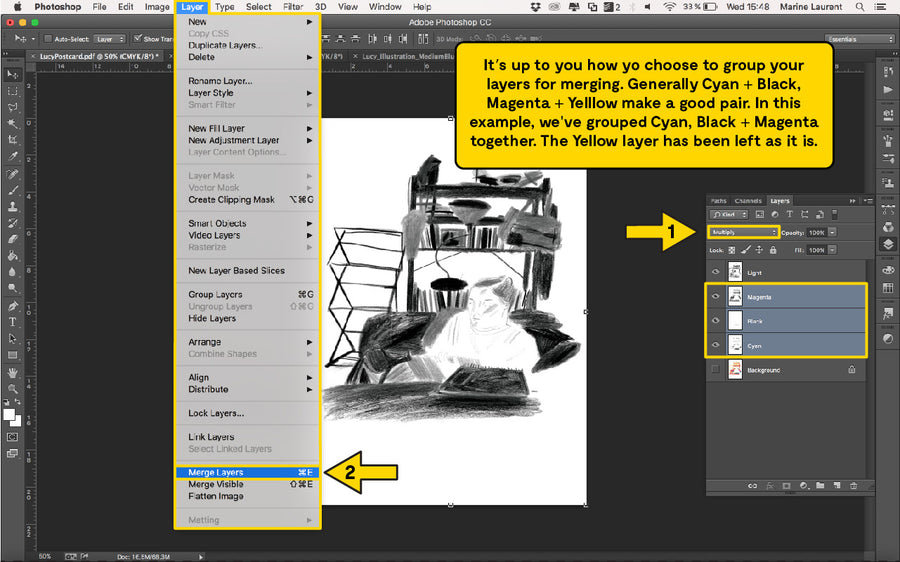
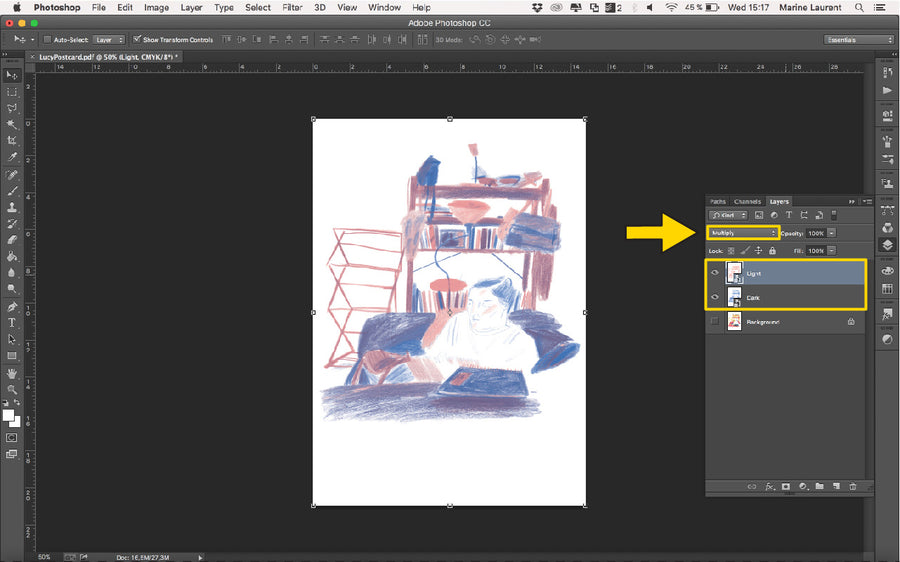
STEP 2: As we're wanting to print in two colours, we need to turn on the 'Multiply' effect, and 'Merge' your chosen dark and light colours together.
STEP 3: Now, you should have your two layers in greyscale. You can now choose the inks you want to print with, and we can simulate these in the next step.

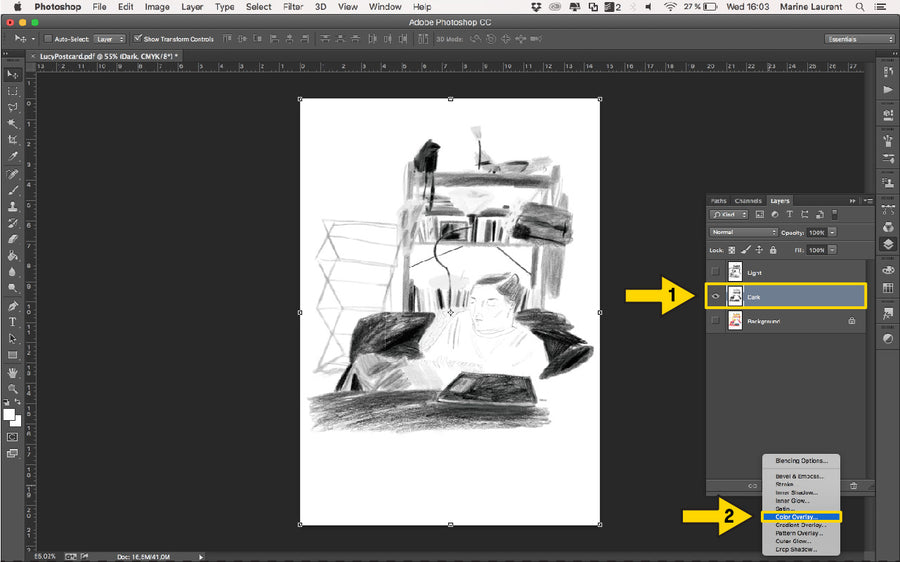
STEP 4: Starting with the 'Dark' layer; Click on the ‘fx’ symbol at the bottom of the ‘Layers’ tab. A drop down will appear. Click on ‘Color Overlay...’.
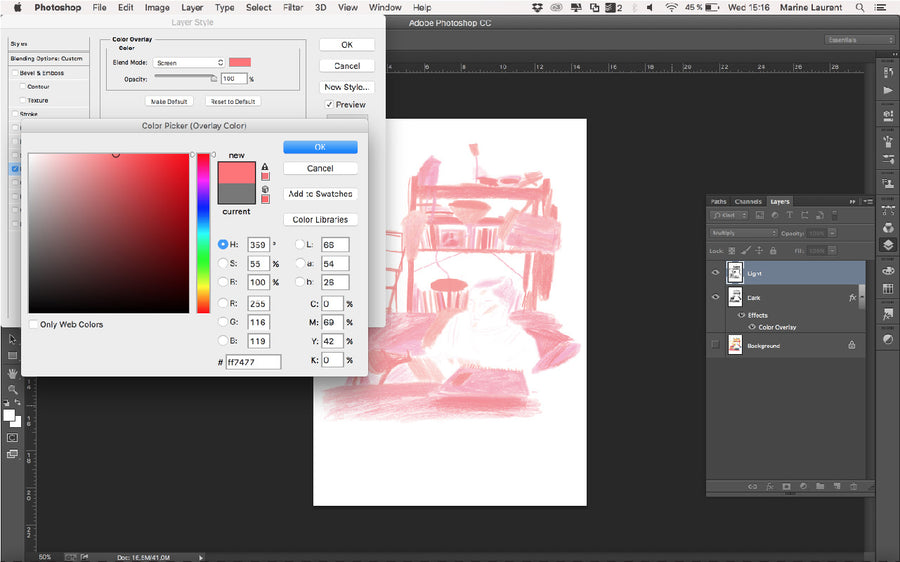
STEP 5: A new window will open. In the 'Color Overlay' tab, change the ‘Blend Mode' to 'Screen'.
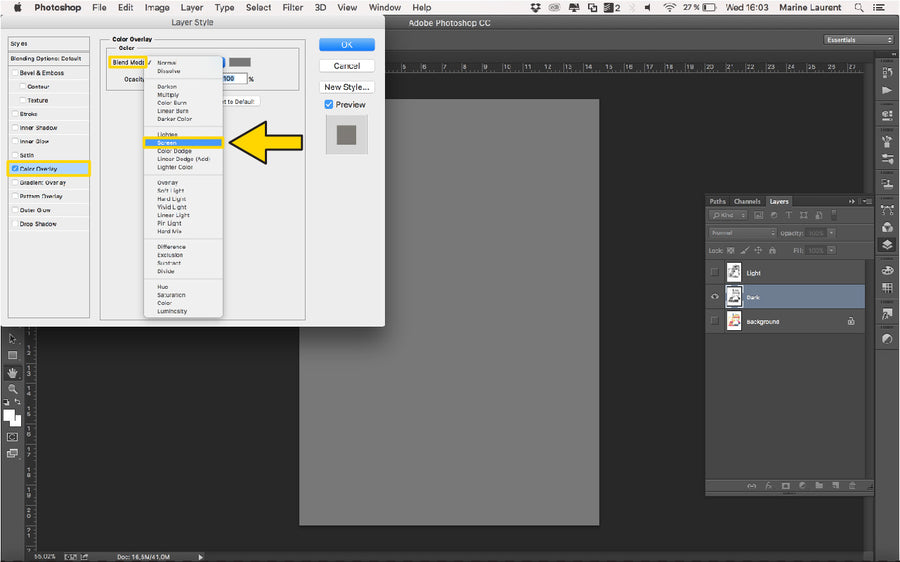
STEP 6: Change the colour to the ink you want to use by double clicking on the rectangle. Select the ink you want in the 'Swatches' tab. Then 'OK'.
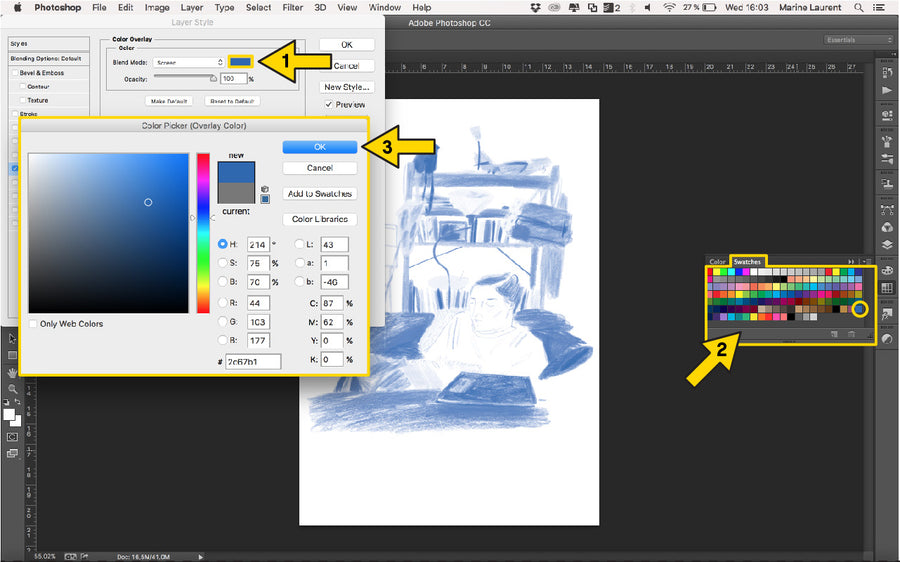
STEP 7: Do the same for each colour layer, by selecting the ink you want to print with.
STEP 8: Once you have choosen your colours, convert each layer to 'Smart Object'. It is important to do this one by one.
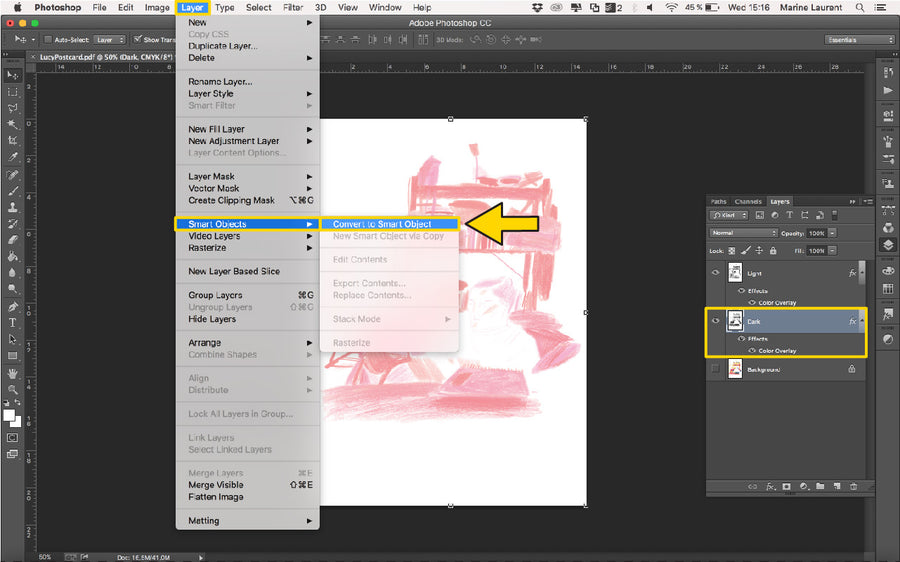
STEP 9: Select the two colour layers and choose 'Multiply' in the drop down. Now you can see simulation of the printed outcome.
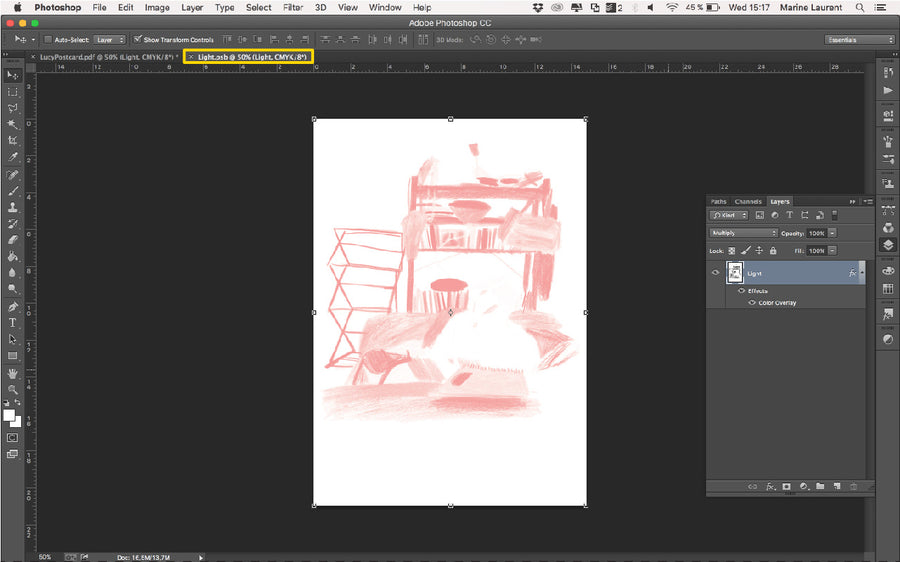
STEP 10: To save your first colour stencil, double-click on the layer to open a new window (.psb file).
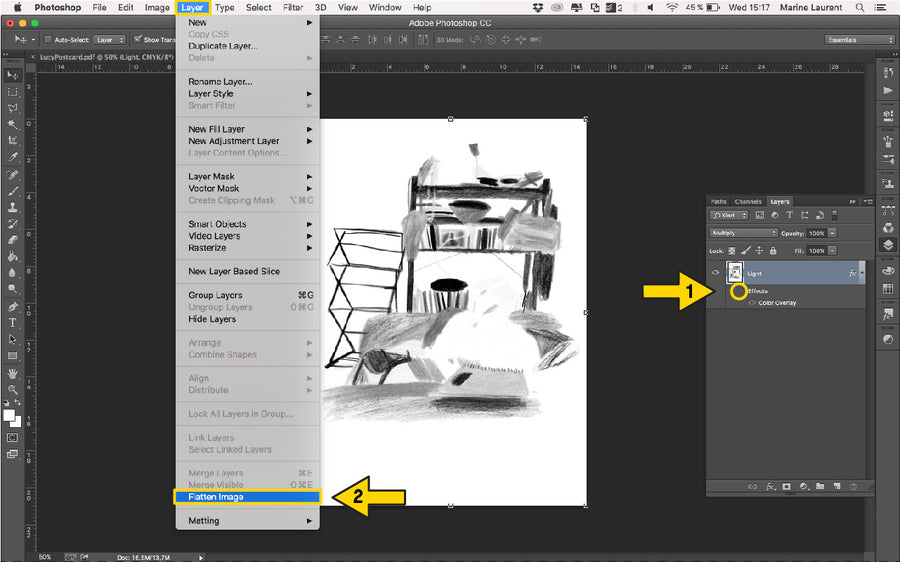
STEP 11: Before you save your stencil, turn off the 'Effects', then 'Flatten' your image.
STEP 12: Now we are ready to save this file. Go to 'File' and 'Save As...'
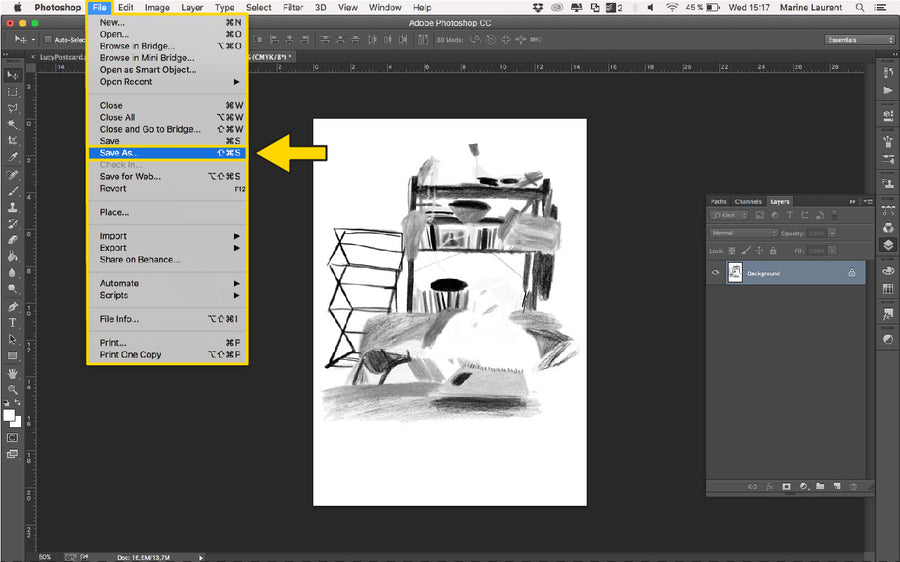
STEP 13: Name your file appropriately with Your name/Project title + the ink colour assigned to the artwork. The format should be PDF, and untick all the boxes.
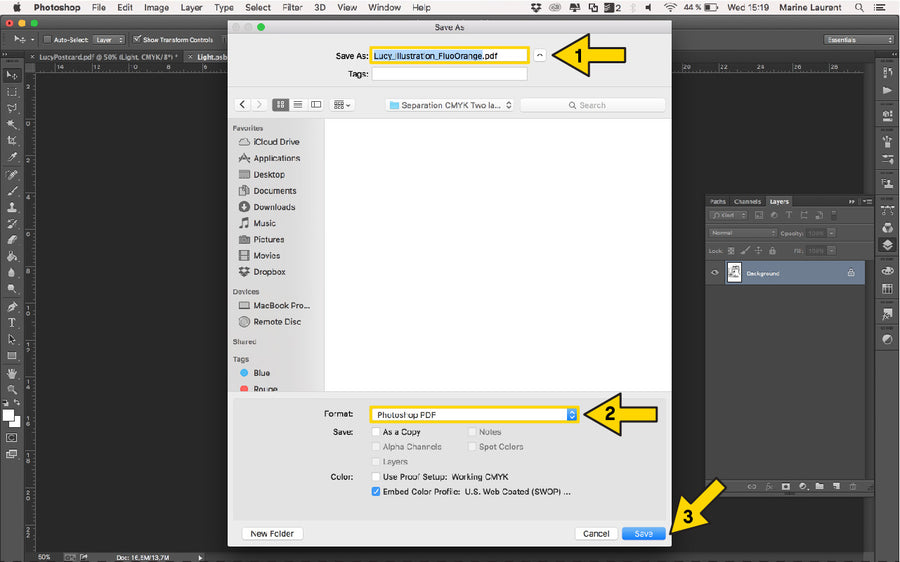
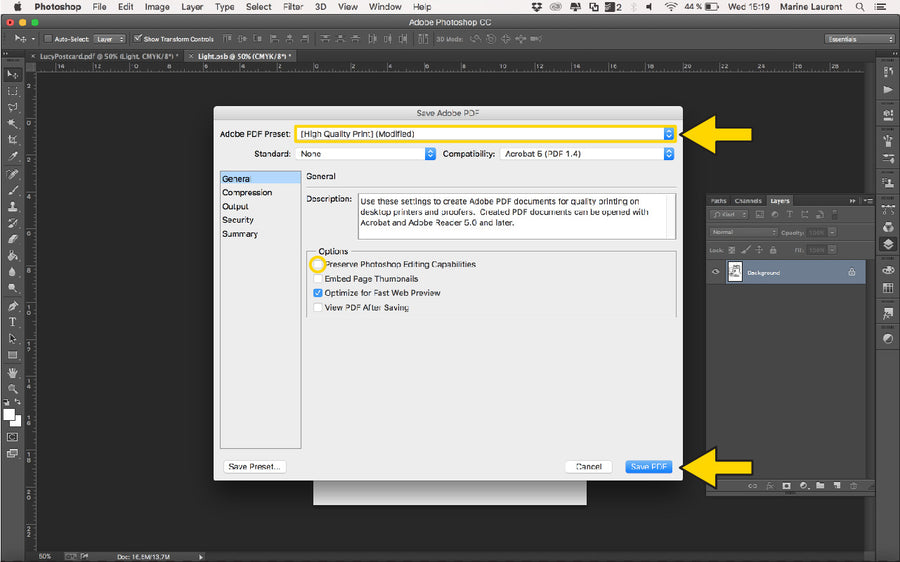
STEP 14: Select the Preset ‘High Quality Print’ and untick ‘Preserve Photoshop Editing Capabilities’. Hit ‘Save’, and you should be left with file under 10MB.
STEP 15: You should finish with three PDFs: your two greyscale stencils as seen above, and full colour proof. You're now ready to print!