Back to Tutorials
PNGs IN ILLUSTATOR
SAVE ARTWORKS AS PNG TO TEST ON OUR PRINT SIMULATOR
STEP 1: If you want to use our print simulator on our website, you will need to save your different colour layers as PNG. Open your artwork in Illustrator.
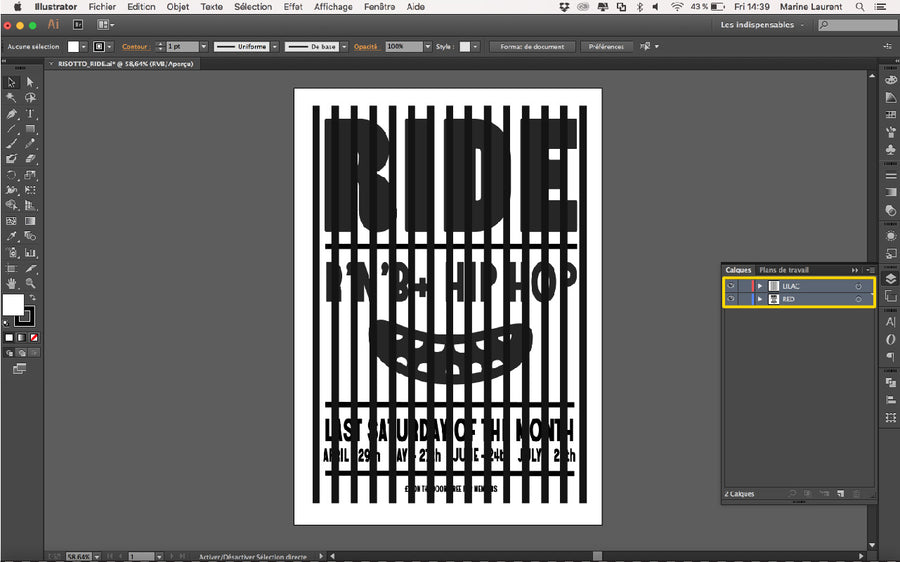
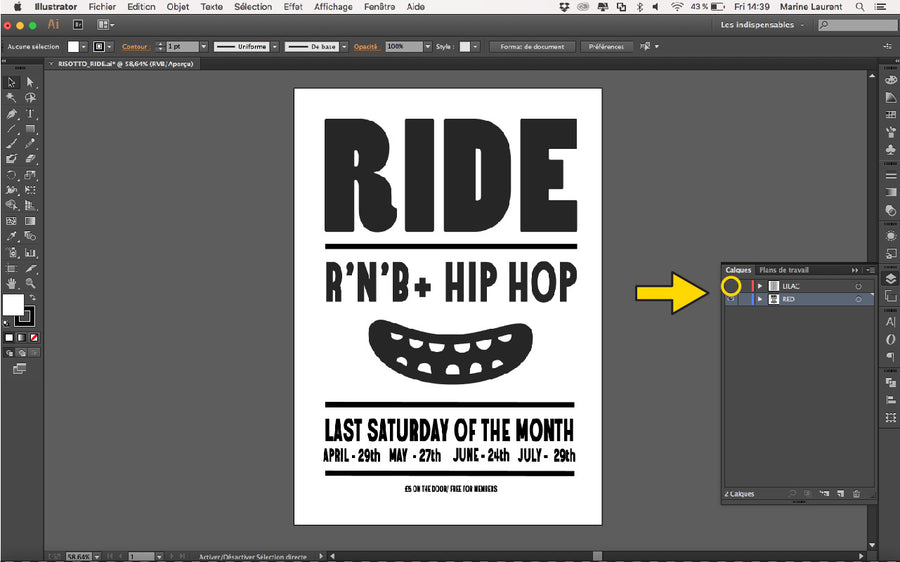
STEP 2: Be sure to have one layer for each colour you want to print with. We'll start with the Red layer. Turn off the others layers.
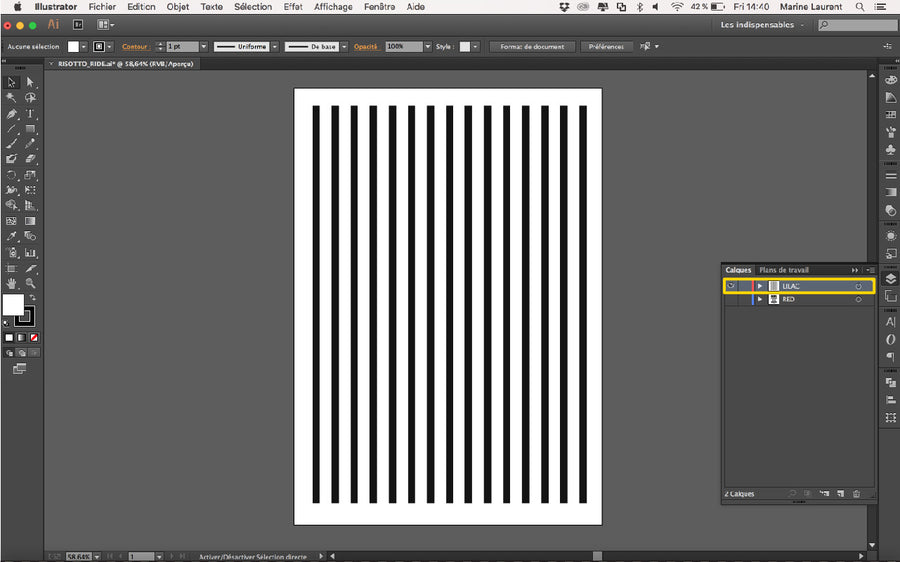
STEP 3: The next thing to check is that all elements are isolated. There should be no white - but transprent spaces for elements 3 containing no 'ink'.
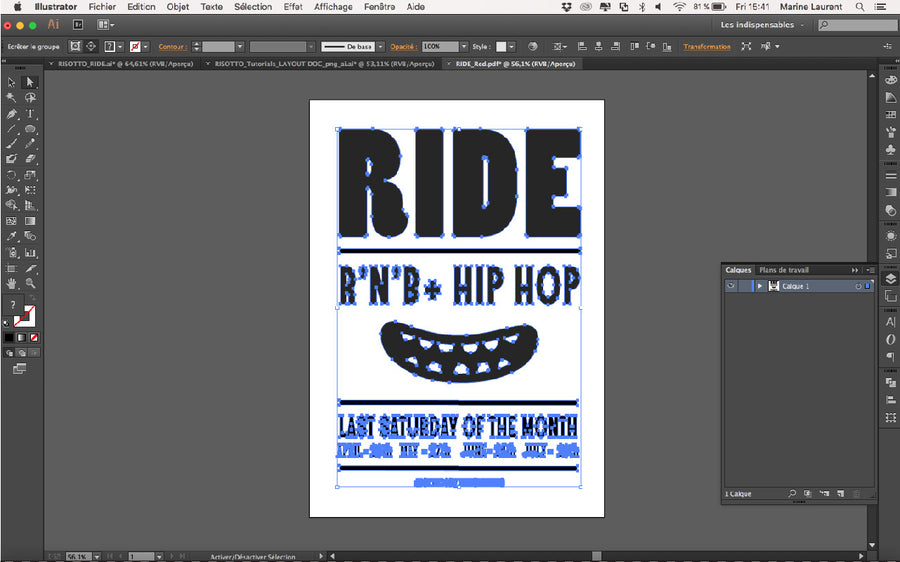
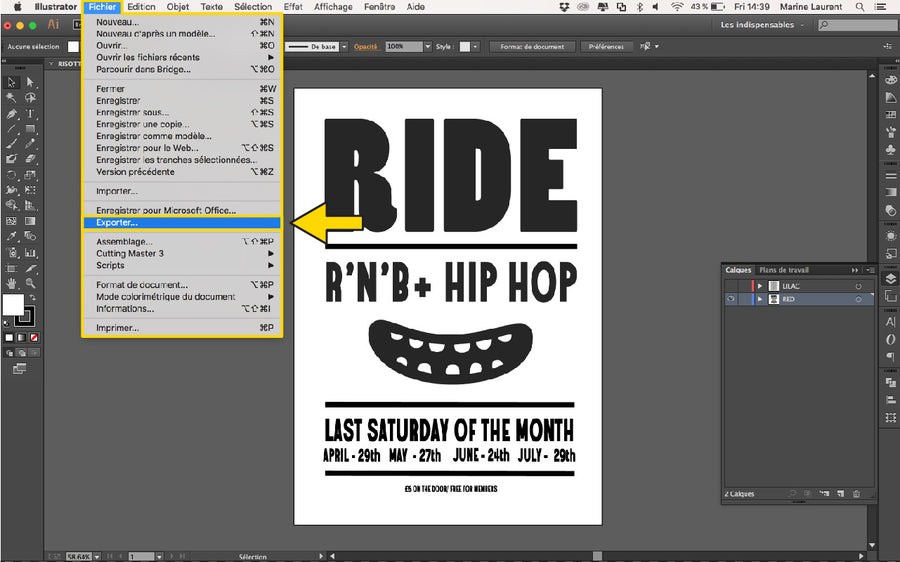
STEP 4: To save the first layer, go to 'File' and 'Export...'
STEP 5: Name your file appropriately with Your name/Project title + the ink colour assigned to the artwork. The format should be PNG. Use your 'Artboards'.
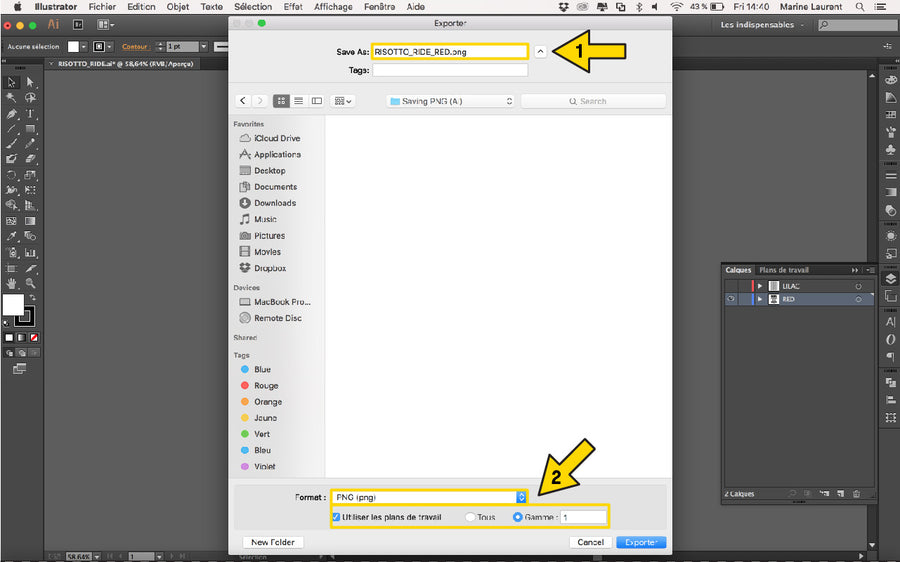
STEP 6: Be sure your background is 'Transparent'. 6

STEP 7: Now, save each colours layers as a PNG.
STEP 8: Note the difference between bad PNG with white teeth, and one with transparent teeth.

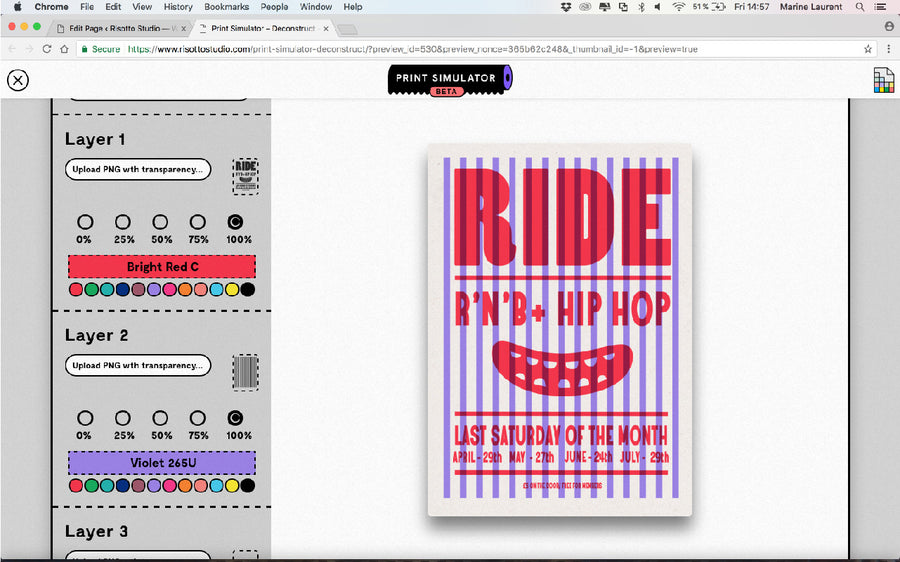
STEP 9: You are now ready to use our Print Simulator! Go on our website to find it.
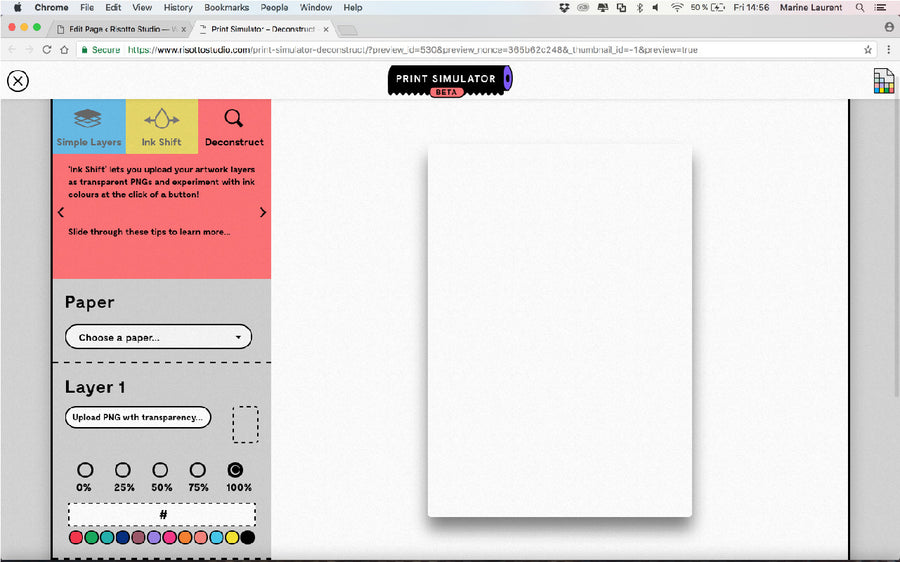
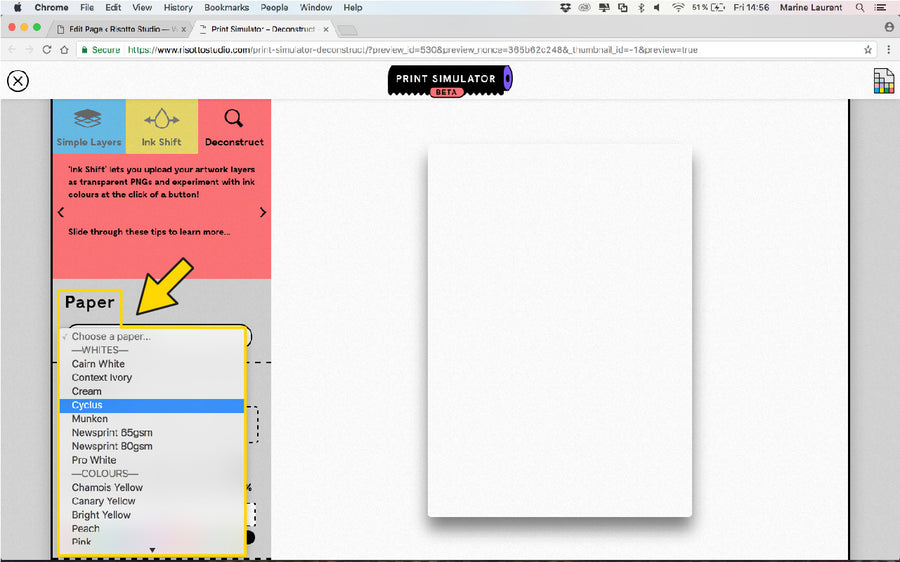
STEP 10: First, select the paper you want to print on. Click on the drop down to choose one.
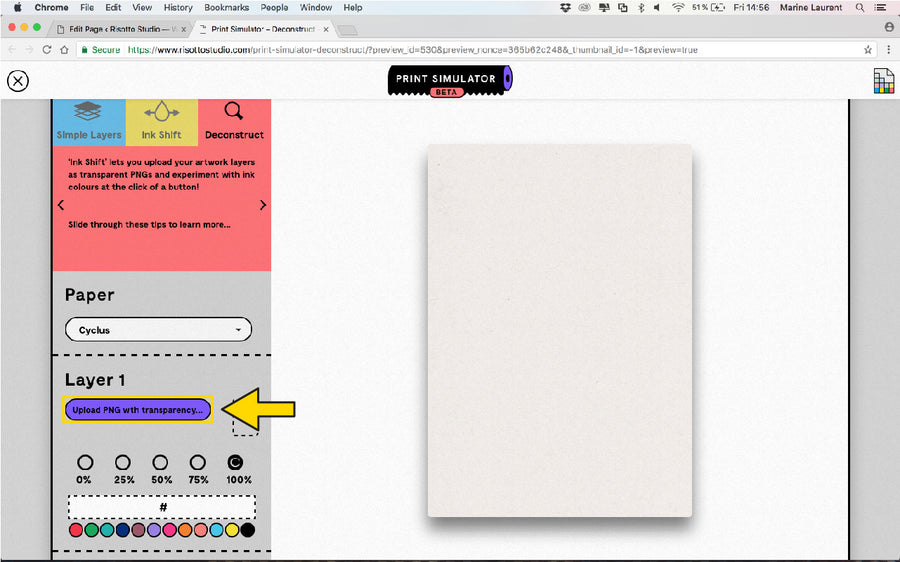
STEP 11: The next step is to import your artwork in the simulator. Click on 'Upload PNG with transparency...' on the 'Layer 1'.
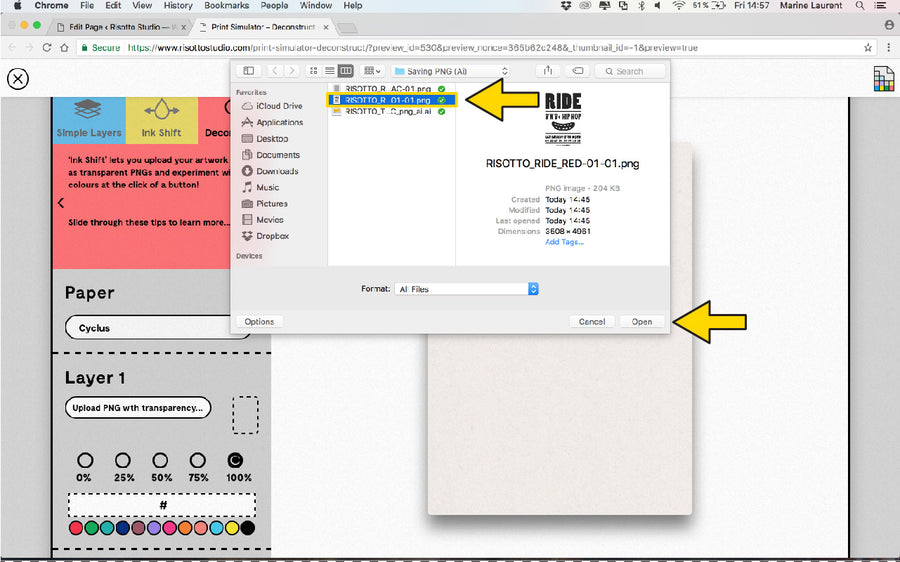
STEP 12: A Finder window will appear. Locate your first stencil of your artwork and 'Open'.
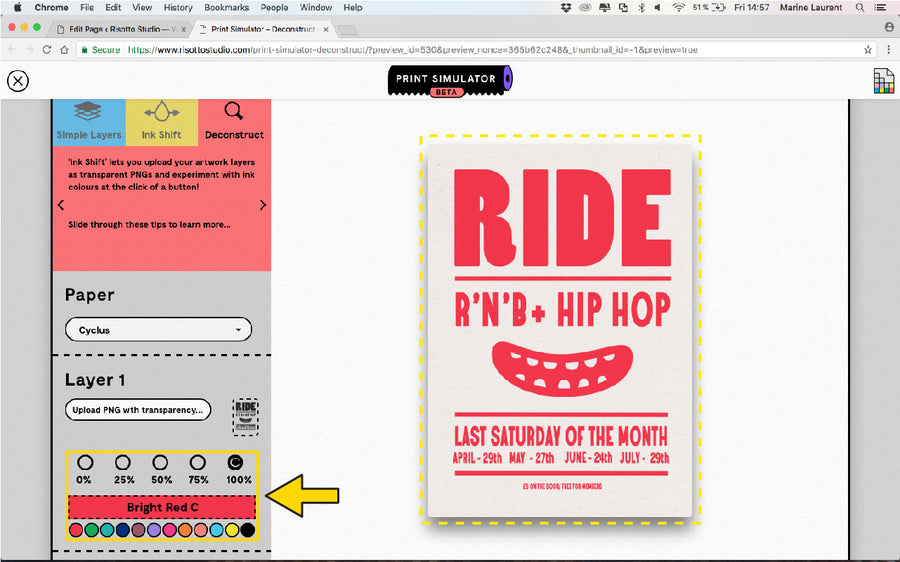
STEP 13: You can now try our different inks and play with the opacity of your artwork.
STEP 14: Import your second stencil in 'Layer 2' and choose an ink. You now have a first overview of the printing result!